Showing posts with label Sean Limbert. Show all posts

Thursday, 23 September 2021

SCONE LOAF


I wasn't quite sure what to call this, a Loaf Scone or a Scone Loaf, a Scone Cake, which ever, it's a scone in a loaf, one massive scone with the jam built in and ready for a luscious blob of clotted cream. As you're just making one, there's less fiddling and faffing about. My tip would be to use a baking liner in case any jam leaks to make it easier to remove from the tin.

I made two versions, one with lemon curd and one with jam and 75g of GlacĂ© Cherries cut into quarters and added to the scone mix.  I've also sprinkled on some sugar nibs for extra showoffiness.


400g Self Raising Flour
50g Sugar
100g Butter/Margarine
200g Milk
3 tbsp Lemon Curd/Jam

Put the flour into a large mixing bowl and rub the butter in till there are no lumps. Now stir through the sugar and slowly add the milk whilst mixing to form a soft dough, I find stirring it with a knife is easiest. You don't want this to be too sticky as it will make it difficult to roll out so keep an eye on it whilst adding the milk.


Once your dough is formed, tip it onto a floured surface and knead it gently to bring it together into a smooth ball.  Roll out the dough into a rough rectangle about 1/2 inch thick.  Spread the Lemon Curd or jam to cover it then carefully roll it into a sausage like a roll poly.  Place your scone into the lined loaf tin and bake at 160C fan for 35-45 minutes.


When it's just out of the oven its a bit like a jam roll poly, so it seemed rude not to try it with a bit (lots) of custard - let me tell you, it worked Xx


Wednesday, 13 May 2020

RAINBOW FAIRY CAKES


I thought I'd pop these very simple fairy cakes on here as something to do with children. They are also a great gift for someone you may want to thank during this bizarre and exceptional time we are currently living in.

If you don't want to make the cakes or can't get hold of ingredients, you might want to buy pre-made plain cakes instead. If not, this is just a basic vanilla sponge recipe. If you really want to go for it, you could also make rainbow sponge buy dividing your mixture and colouring each one differently then divide between your cake cases.


BASIC VANILLA SPONGE (Makes 12|)
100g Butter or Margarine
100g Sugar
100g Self Raising Flour
2 Eggs
1 tsp Vanilla Extract

Cream together the butter and sugar, add the self raising flour, eggs and vanilla and mix till thoroughly combined and there are no lumps or dry flower.

Place 12 fairy cake cases in a muffin tray and divide the mixture equally between them.

DECORATION
Buttercream - 100g Butter or Margarine mixed with 250g Icing Sugar and a little Blue Colour Paste
Fizzy Rainbow Belts
White Mini Marshmallows

Spread or pipe your buttercream on to each fairy cake. Cut the rainbow belt in half and position into the buttercream in an arc. Place 3 marshmallows on each side of the rainbow to represent clouds.

Could not be simpler!
Stay Home Stay Safe
Keep Busy Stay Happy

RAINBOW FAIRY CAKES

Monday, 29 January 2018

ANCIENT SPICED LOAF CAKE


Hello, it's been a while.  I've had a break from blogging but now I'm back and kicking off with this delicately spiced drizzle loaf.  I have to admit that the inspiration came from a slice of cake that I had in the John Lewis Cafe, I loved it and savoured every mouthful trying to distinguish each individual flavour.  It was like the palate test on Master Chef. Anyhow, after a couple of not quite rights I got it and now I'm sharing it with you.  The drizzle makes the sponge extremely moist and the almonds add texture whilst the orange flower water gives it a fragrant turkish delight quality.

The cake in the picture was mostly eaten when it was still warm with a bonus glug of cream and was like a sponge pudding but it was just as exquisite finished off a few hours later cold.  Let me know if yours lasted long enough to taste cold.

You can leave the cake with just the drizzle but I've added chopped pistachios, freeze dried raspberries - available in most supermarkets and dried marigold petals - bought on line and usually used in herbal teas.  I think they really add to its spice trail taste.

CAKE BATTER
170g Butter/Margarine
170g Sugar
150g Self Raising Flour
50g Ground Almonds
1tsp Baking Powder
Zest of 1 Orange
1tsp Ground Cardamom
1tbsp Orange Flower Water
1tbsp Milk
3 Eggs

DRIZZLE
Juice of 1 Orange
30g Sugar
1 tbsp Orange Flower Water


It's as you'd expect and pretty straight forward.  Cream together the butter and sugar till it's light and fluffy.  Now add the remaining ingredients and mix well to combine.  Pour the mix into a lined 2lb loaf tin and level out the surface.  Bake in a preheated oven at 160C fan for 40-50 minutes till cooked, firm to touch and a skewer comes out clean.

While it's baking make the drizzle. Stir the sugar into the orange juice with the orange flower water.  Once the cake is cooked, spoon the drizzle over the loaf while it is still hot, this helps it soak in better then add any decoration you decide on.


Monday, 11 April 2016

WILD GARLIC PESTO


And so it continues, more Wild Garlic recipes. This,  like the Wild Garlic Butter, is a recipe which gives a longer life to your reward from woodland foraging and I have even been known to spread a little onto The Wild Garlic Scones from last weeks blog.

Just like regular basil pesto, everything goes in a processor and gets blitzed to within an inch of it's life.  The recipe is pretty much the same but you omit the garlic and replace the basil with wild garlic leaves.


60g Pine Nuts
100g Wild Garlic Leaves
60g Pecorino / Parmesan grated
250ml Olive Oil
Black Pepper


Start by toasting the pine nuts, pop them into a dry pan and heat till they start to brown.  Toasting them helps to bring out the flavour more.  Now add them to the processor along with the garlic leaves and pecorino.  Whizz everything together then while it's still running, slowly pour in the oil till you get the consistency you are happy with, you may use less of the oil than I have recommended, I like quite a loose blend.  Season with black pepper but not salt, the cheese is already quite salty. Store in a jam jar in the fridge or even freeze if you like.


Saturday, 9 April 2016

SMOKEY WILD GARLIC BUTTER - Lamb Leg Steaks & Wild Garlic Mash


So far I've made scones with the wild garlic leaves which I gathered from some woodland foraging but to ensure I get the most form my delicious tender bounty, I've made wild garlic butter which I know I shall be adding to everything I possibly can in the coming weeks.  

Flavoured butters are a fantastic way of using up left over herbs that are a bit past their best.  You can keep them in the freezer and just chop a bit off as required.  I've also added some smoked salt flakes to this for an extra smack of flavour.

This could not be simpler, chop a 250g block of unsalted butter, use salted if you are not adding the smoked salt. Drop the butter into a food processor and add 50g of Wild Garlic Leaves and a generous teaspoon of Smoked Salt Flakes.

Whizz everything together till the leaves are finely chopped and you have a soft vivid spread.  Divide it into two and form each into a log and wrap in parchment.

You are now ready to boost your cooking with a hit of wild garlic.  Now I realise that not everything on your plate has to be cooked in this enhanced butter but for the purposes of this blog, that's just what I've done and to be honest, there were no complaints.


I heated a thick slice of wild garlic butter in a large frying pan with 1 tbsp of oil to stop the butter burning.  Once the butter started to sizzle I added seasoned lamb leg steaks and cooked them for about 4 minutes on each side. Serve with a drizzle of the wild garlic butter.


We had the lamb with a feta & Onion salad and creamy mashed potato with yes, you guessed it, wild garlic butter and a handful of wild garlic leaves stirred through it.  What's not to like!


Tuesday, 5 April 2016

WILD GARLIC SCONES


At this time of year you can't walk through woodland without coming across a heady carpet of wild garlic covering the shaded floor. I always think it a sign that spring is really upon us and I start to imaging the possibility of some sunshine round the corner, a little naively perhaps.


The pungent odour of wild garlic or Ramsons as it's also known hits you way before you spot the floppy lush leaves. It also grows along the edge of rivers and has a pretty white allium flower.

Its a relative of the chive and can be used as you would spinach, cooked or raw and the flavour can be quite subtle depending on how you use it.

I found mine in some woodland in North Wales, just be mindful if you go foraging and check you are allowed to pick it from it's location


We've had a week of eating wild garlic and I've started with savoury scones. You can use any hard cheese for this recipe, I thought it would be nice to use Yarg, a semi hard cheese from Cornwall that is traditionally wrapped in garlic or nettle leaves to mature but I couldn't find any so good old cheddar it was. You may have more luck than I.

They are so lovely straight from the oven, split and slathered in butter. I usually double this recipe up and make them quite large yielding about 9 but if you go smaller and make lots, they are great to freeze and warm from frozen.


400g Self Raising Flour
70g Butter
1 tsp Dried Mustard
130g Cheese grated
20g Wild Garlic Leaves chopped
Salt & Pepper
200g Milk

Preheat the oven to 190C fan and line a baking sheet with parchment.

Rub the butter into the flour till there are no lumps, add the mustard and seasoning and stir through the cheese.

Fold in to chopped garlic leaves till it's speckled evenly with green then pour your milk in gradually whilst string to combine. I find using a knife is best for this. Don't worry if you need to add a little more milk if it's a bit dry.

Once everything is in, bring it together with your hands and tip the dough onto a floured surface.  Knead it gently just to bring it together into a smooth ball.

Roll out the dough slightly, I find that to get a good thick scone, slightly under the depth of your cutter is a good guide for the thickness of your dough.  Cut out the scones then re-roll the remaining dough till it has all been used. Brush the tops with milk then bake for 20-25 minutes till cooked through and golden.


Monday, 14 March 2016

SLOW COOKED INDIAN SPICED LAMB IN GINGER BEER


So here is an alternative idea for your Easter lamb.  Sainsbury's gave me a challenge of cooking a leg of lamb but adding a 'Little Twist' and using ginger beer. Here is what I came up with.

Ginger beer already has a bit of heat to it so the addition of Indian spices are the perfect marriage.  If you're organised enough you can marinade your lamb over night but it's still super delicious if you do it an hour or so before cooking.  You could cover the base of your roasting dish with slices of waxy potatoes such as Charlotte or Jersey Royals to cook your lamb on, they will cook in the juices and soak up all those lovely flavours.

Slow cooking the meat gives it a melt in the mouth texture that just falls of the bone. I marinade the lamb the day before then pop it in the oven when I get up in the morning.  I don't have to think about it then untill lunch time and it's ready to serve.  The gravy from this dish was delicious, the indian spices and a bit of sweetness from the ginger beer made it very popular indeed.

1tsp Ground Coriander
2tsp Cumin seeds
1/2 tsp Tumeric
1 tsp Cinnamon
3 Garlic Cloves crushed
1 Thumb of Ginger peeled and grated
Lemon Juice to mix paste
31g pack fresh Coriander chopped
2.5kg Leg of Lamb
500g Charlotte Potatoes (optional)
500ml Ginger Beer

In a bowl combine all the spices, garlic and ginger then add enough lemon juice to form a slightly runny paste and stir in the coriander.  Pierce the meat all over.  Smother the lamb with the marinade and massage it in.  Seal in a large food bag or non-metalic container and chill over night.


When you are ready to cook your lamb, heat the oven to 150C.  Place the marinated lamb in a deep sided flame proof roasting dish and pour the ginger beer around it.  Seal with a lid or foil and leave it to cook for 5 hours, basting from time to time.

Once the lamb has cooked, carefuly remove it from the pan and cover with foil to keep it warm.  Skim off any excess fat and transfer the pan to the hob to make a gravy.  Add 2tbsp of flour, stir for a couple of minutes to cook the flour and thicken your gravy, you can add a little hot water to make it go a bit further if you like.

You can now serve your lamb with the gravy poured over it or separtely with rice or the potatoes if using.


Friday, 20 November 2015

CHEWY ALMOND BISCUITS


OMGosh, I'm addicted to these biscuits, I made them for friends as a gift when we went for dinner and now I can't stop making them. I have a feeling that everyone will be getting a parcel of these from me this christmas.

Because they are made with just almonds, icing sugar and egg white they have a light crisp outer shell and a soft chewy middle a bit like a macaron, what's not to like?  As they are so irresistible this batch makes quite a lot but why mess about, lets face it they'll get eaten before you can give them away.

Give them a go and you too will be making small hampers of them as gifts this year.


Makes 30


300g Icing Sugar
230g Ground Almonds
2 Egg Whites
1 tsp Almond Extract
100g Flaked Almonds
Icing Sugar to Dust


In a bowl combine the icing sugar, ground almonds, egg whites and almond extract.  I use my free standing mixer.  It will come together into a thick paste.

Scoop out a large teaspoon of the mix and roll in your palm to form a ball, about the size of a walnut. Now role the the ball in the flaked almonds and place on a baking sheet lined with parchment.  Repeat until you have used all the mixture.  I found it easier to make all the balls then role them in the almonds as you get a but sticky.  Give them enough room on the parchment to spread a little.

Once they are all made, give them a liberal dustin with icing sugar and bake for 15 minutes at 160C Fan.  Dust again with icing sugar and leave to cool a little on the baking tray before transferring to a cooling rack.  try to resist having one straight away, ok, maybe just one :)


Thursday, 12 November 2015

CHRISTMAS BREAD PUDDING


I must confess that as a child, if we were ever fortunate enough to have the opportunity to select a cake from the cake shop, I would quite often opt for the bread pudding.  Mainly because it appeared to be the largest cake available.  I realise now that it was probably a great money spinner for the bakers giving them a new lease of life for the unsold stale bread.

Bread pudding is a proper comfort food with its warming spices and stodgy texture and perfect for this time of year.  I made some after our halloween party when we had lots of hotdog rolls left over and it reminded me of christmas pudding so I thought I'd take it a step further and give it a bit more yule tide pimping.  So here we have my christmas bread pudding which we ate warm with cream and custard. I think it tastes like christmas but a lot quicker to make than the usual pudding.

1 Litre Milk
130g Sugar
300g Dried Cranberries
200g Sultanas
75g Butter
1 tsp Cinnamon
1 tsp Mixed Spice
Zest of 1 Orange
1 tsp Orange Extract
700g Bread (made into bread crumbs)
2 Eggs
2 tbsp Demerara Sugar
40g Flaked Almonds
2 tbsp Granulated Sugar


Butter a large baking dish (30cm x 20cm).  Heat the oven to 160C fan

Warm the milk in a large pan with the sugar, cranberries, sultanas, butter, cinnamon, mixed spice, orange zest and extract.  Heat till the buyer has melted then pour in the bread crumbs and stir till combined.  Now mix in the eggs.

Tip the mixture into the baking dish and gently spread it out evenly.  Don't squash it, you want a rough top with texture.  Scatter the flaked almonds and Demerara sugar on top and cover the whole dish in foil.  Bake for 40 minutes then remove the foil and give it another 15 minutes uncovered.  Remove from the oven and sprinkle immediately with granulated sugar.


Thursday, 1 October 2015

FINNISH BUTTER EYE BUNS - VOISILMAPULLA


This summer I discovered these heavenly sweet rolls in Finland where I also learned that Finns love cardamom as much as I do.  On my first day at the breakfast buffet I tried a bit of everything I wasn't sure about and discovered Voisilmapulla - Butter Eye Buns.  They are a sugary sweet bread, a cross between brioche and bath buns with a warming flavour of cardamom. Butter because they are packed with the stuff and eye because of the dimple in the middle which is filled with even more butter.

Don't be scared of the amount of melted butter you have to knead in, a bit like focaccia, you think it's never going to happen, but it does and it's what gives it a light airy texture. I used my freestanding mixer to start it off then finish it by hand.

I've sprinkled mine with sugar nibs but that's optional, I know they're not easy to get in shops here - you could try the internet. We had them with and without in Finland. In the recipe it says 2 tsp of cardamom but you could add more depending on how much you like the stuff, I put 3 in the next time I made them.

This is the recipe my Finnish friend Linda gave me, it makes 18 healthy sized buns, don't worry they freeze well and if you're going to go to the effort of making them, why not make lots. I divided mine in half and made a loaf too which we had toasted with cinnamon butter.


550g Milk, warmed
175g Sugar
2 Eggs
900g Strong White Bread Flour
2 Heaped tsp Ground Cardamom
20g Dried Yeast
200g Butter, melted

50g Butter
1tbsp Sugar
Egg Wash to glaze
Sugar Nibs to finish (optional)


Warm the milk and sugar till the sugar has just dissolved, you don't want it boiling. Now add the eggs and whisk together.

In a large bowl or free standing mixer combine the flour, cardamom and yeast.  Slowly stir in the milk.  If you're doing this by hand, use a knife till it starts to come together.  Once the milk is completely combined with the flour, pour in the melted butter.

This is where it gets really messy, there is a lot of squelching before it starts to resemble the smooth sticky dough you are aiming for.  Once all the butter is incorporated into the dough start kneading.  It will be sticky but try not to add flour,  dust your hands lightly with flour instead.  I always knead for 10 minutes to ensure a good result.

Divide the dough in two and place into floured bowls, cover with cling film or a shower cap and leave  in a warm place to prove for 1 hour.

Once the dough has doubled in size, knock it back and divide into 100g balls.  Shape them and place on a baking sheet lined with parchment with enough room to rise again.  Cover the buns with a clean dry tea towel and leave for 30-45 minutes to prove again.


Whilst they are proving, melt the remaining butter and sugar and leave to one side.  To finish the buns (no pun intended) press a deep dimple into each using your thumb, it will spring back a little, then fill with the melted butter, brush over with egg wash and sprinkle with sugar nibs if using them.

Bake in a preheated oven at 200C / 180C fan for 15-20 minutes.


Hyvää ruokahalua  Xx

Tuesday, 22 September 2015

BACON BUTTERMILK PANCAKE DIPPERS


This recipe is for those thick american style pancakes that go so well with bacon but I’ve combined the two to make a dipper already to be dunked into maple syrup.

Now I understand that the idea of sweet and savoury is not everyones cup of tea but these are really worth a go. If you feel you can’t cope with the idea, these fluffy buttermilk pancakes are just as good without the bacon and served with your usual topping, fresh fruit, honey or chocolate spread.


200g Plain Flour
2 tsp Baking Powder
1/2 tsp Bicarbonate of Soda
30g Sugar
2 Eggs
30g Melted Butter
284 ml Buttermilk
100g Milk
14 Streaky Bacon Rashers


Put the flour, baking powder, bicarbonate of soda sugar in a large mixing bowl and combine.  Make a well in the centre of the flour and add the eggs.  Using a fork mix in the eggs then add the melted butter.


Once they are mixed in stir in the buttermilk using a whisk.  When you have made a smooth batter whisk in the milk to loosen it a little. I pour my batter into an old sauce bottle with a wide opening to help control the flow of batter, I find it a lot easier than a ladle or jug. Leave the batter to one side while you cook the bacon.


You can grill the bacon or heat the oven 180C/160 fan.  Lay the bacon rashers out on a baking tray lined with parchment and cook for 15 minutes till browned and slightly crisp.  Heat a non-stick frying pan and brush lightly with oil.


Pour 2 strips of batter into the pan then lay a rasher of bacon on top, drizzle a little more batter over the bacon and cook for 2 minutes then flip over and cook for a further minute.  

Keep warm whilst you cook the remaining dippers and serve with maple syrup


HAVE A NICE DAY NOW Xx

Wednesday, 2 September 2015

SOPHIE THOMPSON - MY FAMILY KITCHEN and VERY LEMONY ALMOND & POLENTA CAKE


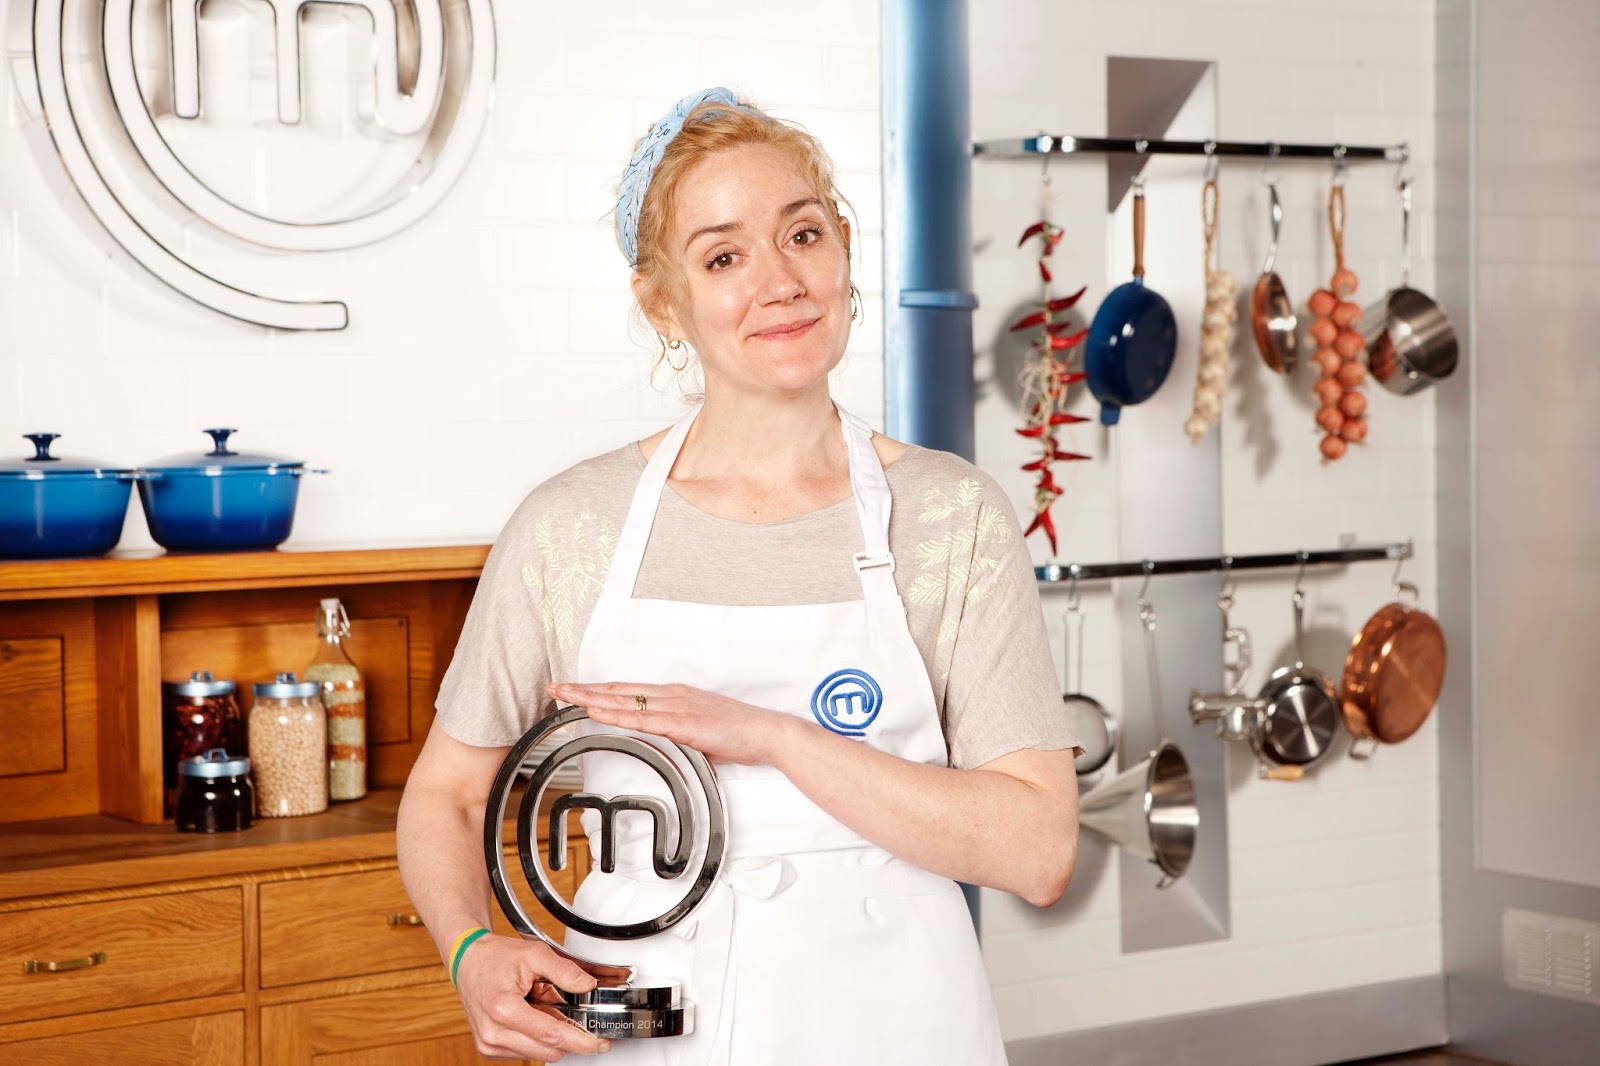
I get asked to review such a variety of  products and tend to say no but to be honest I really wanted this book so jumped at the chance and it didn't disappoint. I am a fan of MasterChef and in 2014 when Sophie Thompson was crowned champion, she became one of my favourite celebrity winners, she came across as lovely as her cooking. I was so pleased to find that she has produced a book of her family's recipes, and they really are from all of her family.

Sophie was a joy to watch with her relaxed and imaginative style of cooking and the book reflects the same sense of cosy homeliness giving you lots of family photos, stories and anecdotes along with the recipes. With titles like 'Uncle Bridget's Pickled Onions', yes, Uncle Bridget and 'Megsies Whim Wham' you get introduced to her family and friends through food.


Much to my husbands irritation I can't sit and do nothing so in the evening when I'm slumped in front of the telly I tend to be making lists (a girl thing I think) flicking through the latest foodie magazine or crafting some sort of what not.  Reading cookery books is another favourite, looking for inspiration for next weeks dinner.  Sophie's book was packed with possibilities and the issue was what to cook first.


In the end that honour went to Very Lemony Almond & Polenta Cake.  It instructs you to cool in the tin but I don't think it ever actually got cold before it was polished off.  In the end I had to make another just to check it was as good cold as warm - it was.  There are some cakes that I call untidy cakes, by which I mean that every time you pass it you find you just have to cut a slice off to neaten it up a bit. I found myself having to neaten it rather a lot and often.


Sophie's recipes are all easy to follow and without complicated or hard to get ingredients.  I also tried the Orange & Ginger Chicken with Coriander Rice, not just because it sounded tasty but I also had all the ingredients in.  It was a resounding 'keep that recipe' from the whole family.


With so much success I tried Sophie's own Meat Loaf.  It makes enough for 8 so we had it hot with roast potatoes and savoy cabbage then on another day, cold with pickles as Sophie recommends.  Another triumph.

Reading Sophie's recipes and about her family makes you warm to her even more, it's always such a shame when you meet someone you admire or look up to and they let you down but after looking through this family album you really do feel like you've just met her and want to be invited round to supper.
 

Sophie is a gifted and resourceful cook with an infectious enthusiasm for food and 'My Family Kitchen' is just what it says on the tin (or cover),  packed with recipes that are sure to become everyone's own family favourites.


VERY LEMONY ALMOND & POLENTA CAKE

Serves 8-10
150g Polenta
150g Ground Almonds
150g Caster Sugar
1 tsp Baking Powder
200g Soft Butter, plus extra for greasing
3 Large Eggs
Zest & Juice of 3 Large Lemons
100g Icing Sugar, sifted
20g Flaked Almonds, toasted

Preheat the oven to 180C/160C Fan Gas 4. Lightly grease and base line a 20cm springform cake tin.

Place the polenta, ground almonds, caster sugar, baking powder and butter in the bowl of a food processor. Blitz together for about 30 seconds to combine. Add the eggs, one at a time, whizzing after each one to incorporate well. Add the lemon zest and whizz again for about 20 seconds. (If you don't have a food processor you can of course do all of this by hand using a large mixing bowl and spoon).

Spoon the mixture into your prepared tin and smooth the top. Bake in the centre of the oven for 45 minutes, or until golden brown and coming away slightly from the edges of the tin. 

Meanwhile mix the icing sugar with the lemon juice (about 100ml) in a bowl and whisk together until smooth. When the cake comes out of the oven, use  skewer to make holes all over the top of the cake and, whilst still warm, pour your lemony syrup over the top.


Scatter over the toasted flaked almonds, while the cake is still sticky, and leave to cool in the tin. Remove from the tin when cold and serve. 


Recipe reproduced by permission of the publisher

Watch Sophie cook her Sweet & Sour Pork

Buy Sophie's book here


Thursday, 4 June 2015

FISH FINGER SANDWICH


Recently I gave my children fish finger sandwiches for dinner and felt a slight tinge of guilt for not giving them something 'proper'.  The problem was, they were quite delicious and I found myself craving one for myself.  A definite guilty pleasure.

It got me to thinking though, perhaps I could compensate for my lapse as a good mother by creating the perfect fish finger sandwich from scratch rather than a frozen packet, I even made the tartar sauce and some accompanying mushy peas.  It worked and by golly it was heavenly, guilt gone and I am a good mother again.

I used Hake, not the traditional choice but this lesser used fish is just as good as cod and to get that customary orange crumb I've dry fried some chorizo then whizzed it with the bread to make the bread crumbs.  There is enough oil in the chorizo to then just bake them in the oven - simples!

350g Hake Fillet
Flour for dusting
1 Egg Beaten
50g Chorizo
50g Bread for Crumbs

First make your bread crumbs.  Cut the chorizo into slices then each slice in half.  Dry fry them in a pan and allow to cool a little.  Put your bread in a processor along with the chorizo and whizz them into crumbs.  The chorizo will excrete a lovely orange tainted oil into the pan, stir the crumbs into this till combined.

Wash and pat dry the fish in some kitchen roll then cut them into fingers.  Dust each one in flour then dip in the egg.  Now coat the fish finger in the bread crumbs.

Place them on a baking sheet and cook for 20 minutes at 180C. Serve in buttered slices of crusty bread such as Pain de Campagne with tartar sauce and mushy peas on the side.


Tartar Sauce                                                                                         
4 tbsp Mayonnaise                                                                    
1 tbsp Capers Chopped                                        
2 tbsp Tiny Gherkins Chopped                            
1 Shallot Chopped                                              
Lemon Juice to taste
S+P                            

Chop everything finely and mix it all together.  I have to admit that capers are on my very short list of foods I can't bring myself to eat so I didn't put them in and I could tell it wasn't quite right.  So if you don't have the same aversion, keep em in.              


Mushy Peas                                                           
250g Frozen Peas                                                  
1 tbsp Sour Cream                                                 
1 tsp Mint Sauce                                                   
S+P

Boil the peas in hot water, drain and whizz them in a processor with the remaining ingredients.  I didn't process them too much so there was some texture and not baby food